Create Bill
All Resources listed on the Bill must have an associated Resource Rate in the Billing module. If the user attempts to create the Bill and there is a Resource that does not have an associated Resource Rate, then the user will see an error. Contact an Administrator to request that the Resource Rate is added for the Resource.
Note: An Incident will only be displayed in the “Wildfire – Approved Report” tab if the Incident is a Wildfire, there is an approved Final Fire Report for that Incident, and there is not an existing Bill for that Incident. If there is an existing Bill for the Incident then the Incident will be located in the Bills grid.
Follow the steps below to create a bill in the Billing module:
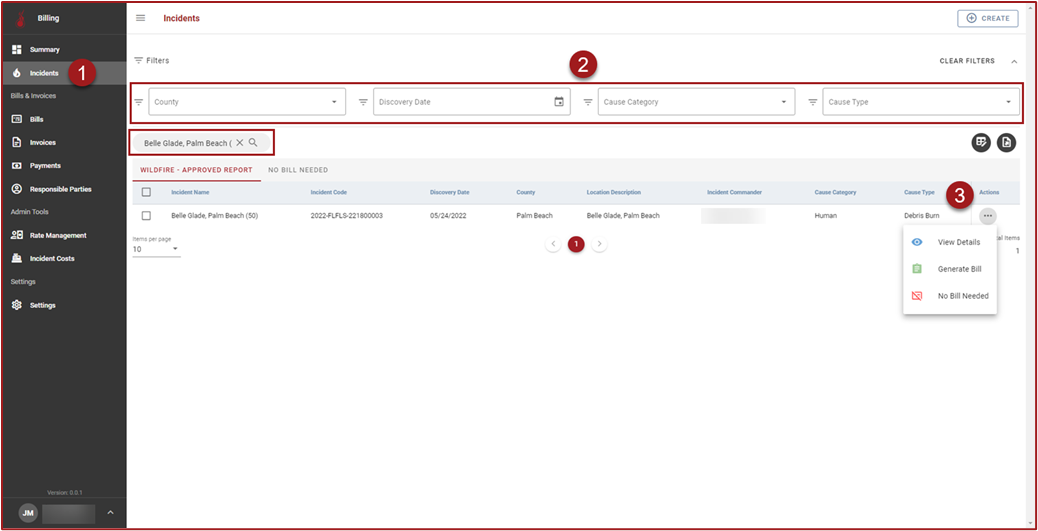
Select Incidents in the side navigation bar. On the Incidents grid the “Wildfire – Approved Report” tab will be selected by default.
Use the filters and/or perform a wildcard search for the Incident Name to find the Incident.
Click “3 dots” in the Actions column and then click View Details to open the Incident Details page.
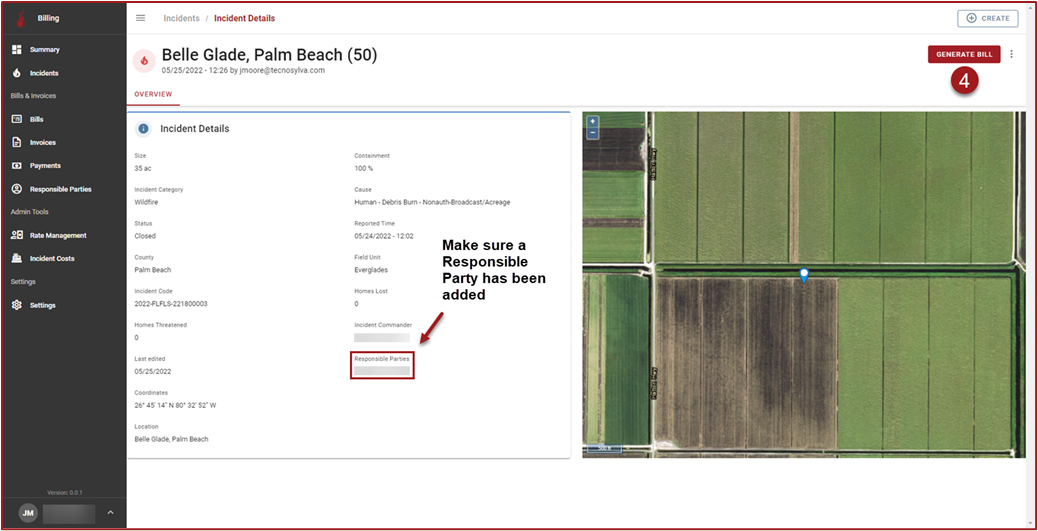
On the Incident Details page click Generate Bill.
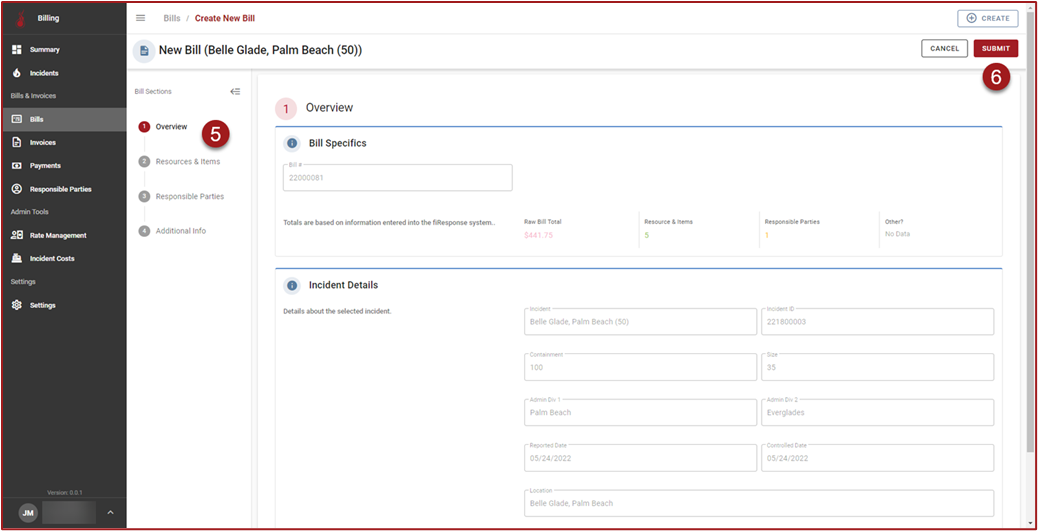
Use the stepper to navigate between steps and review Bill information.
Click Submit to create the Bill. After clicking Submit a record for the Bill will be created and the user will be redirected to the Bills grid.
Tip: Make sure Responsible Parties have been selected and are displayed on the Incident Details page. The Bill must have associated Responsible Parties in order to create Invoice(s) in later steps. Responsible Parties cannot be added in the Billing Module. Responsible Parties must be added in the Final Fire Report module.
Note: If any information on Step 2: Resources & Items needs to be edited, the correct workflow is to click Submit to create the Bill and then edit the Bill after the Bill has been created.