Drawing Map Features
You must upload Mapping edits through the Main App Sync or My Edits so other users can see them. When you have pending edits, the My Edits button on the bottom navigation bar and on the Home screen will change to appear in red.
Add map features to enhance situational awareness by digitizing or by using the mobile device’s internal GPS to collect data. To draw map features, tap on the Map tab on the Incident Info screen for the preferred Incident to open the Incident Map.
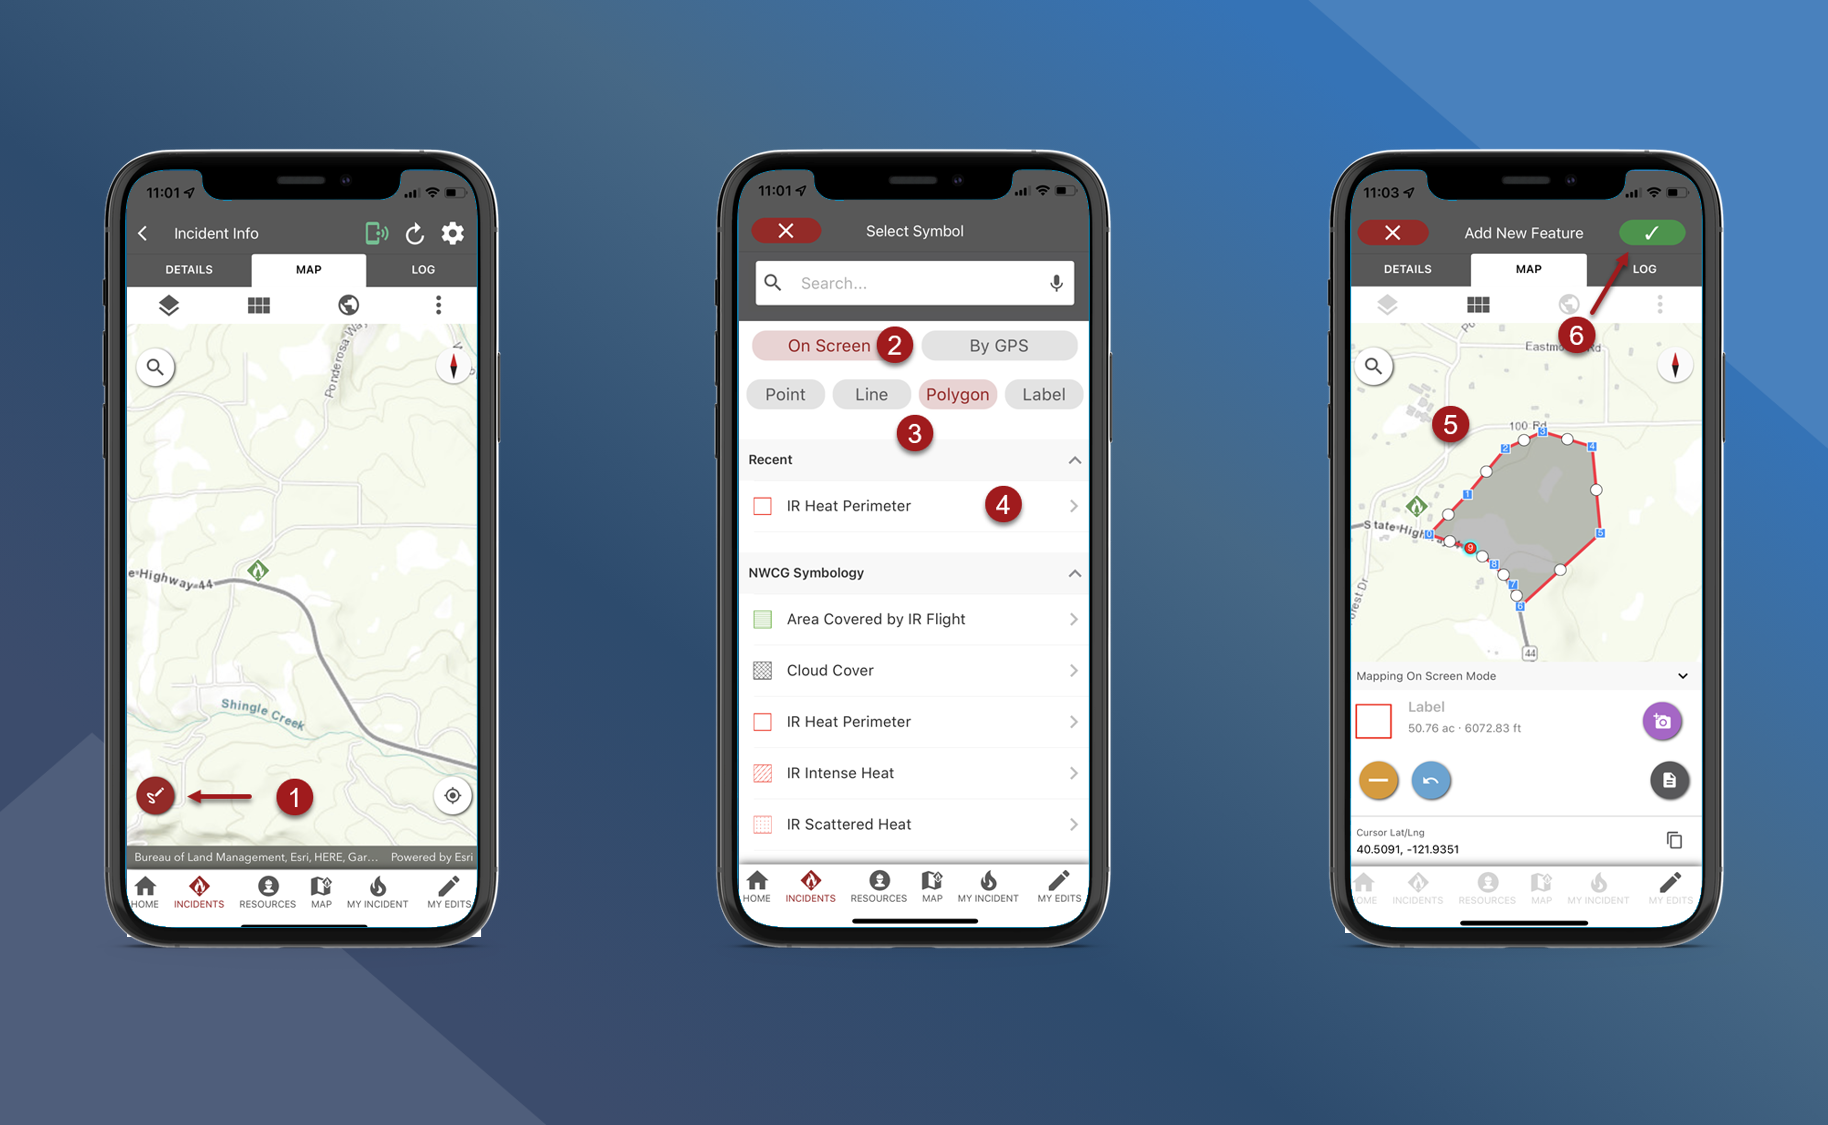
Digitize a Feature
Tap the Create Map Feature button in the lower left corner of the screen
Select On Screen to digitize on the map
Select map feature type (Point, Line, Polygon, or Label)
Select symbology (Select either NWCG Symbology or Basic Symbology)
Add points for the feature by tapping on the screen
When finished tap
 in the top right corner of the screen
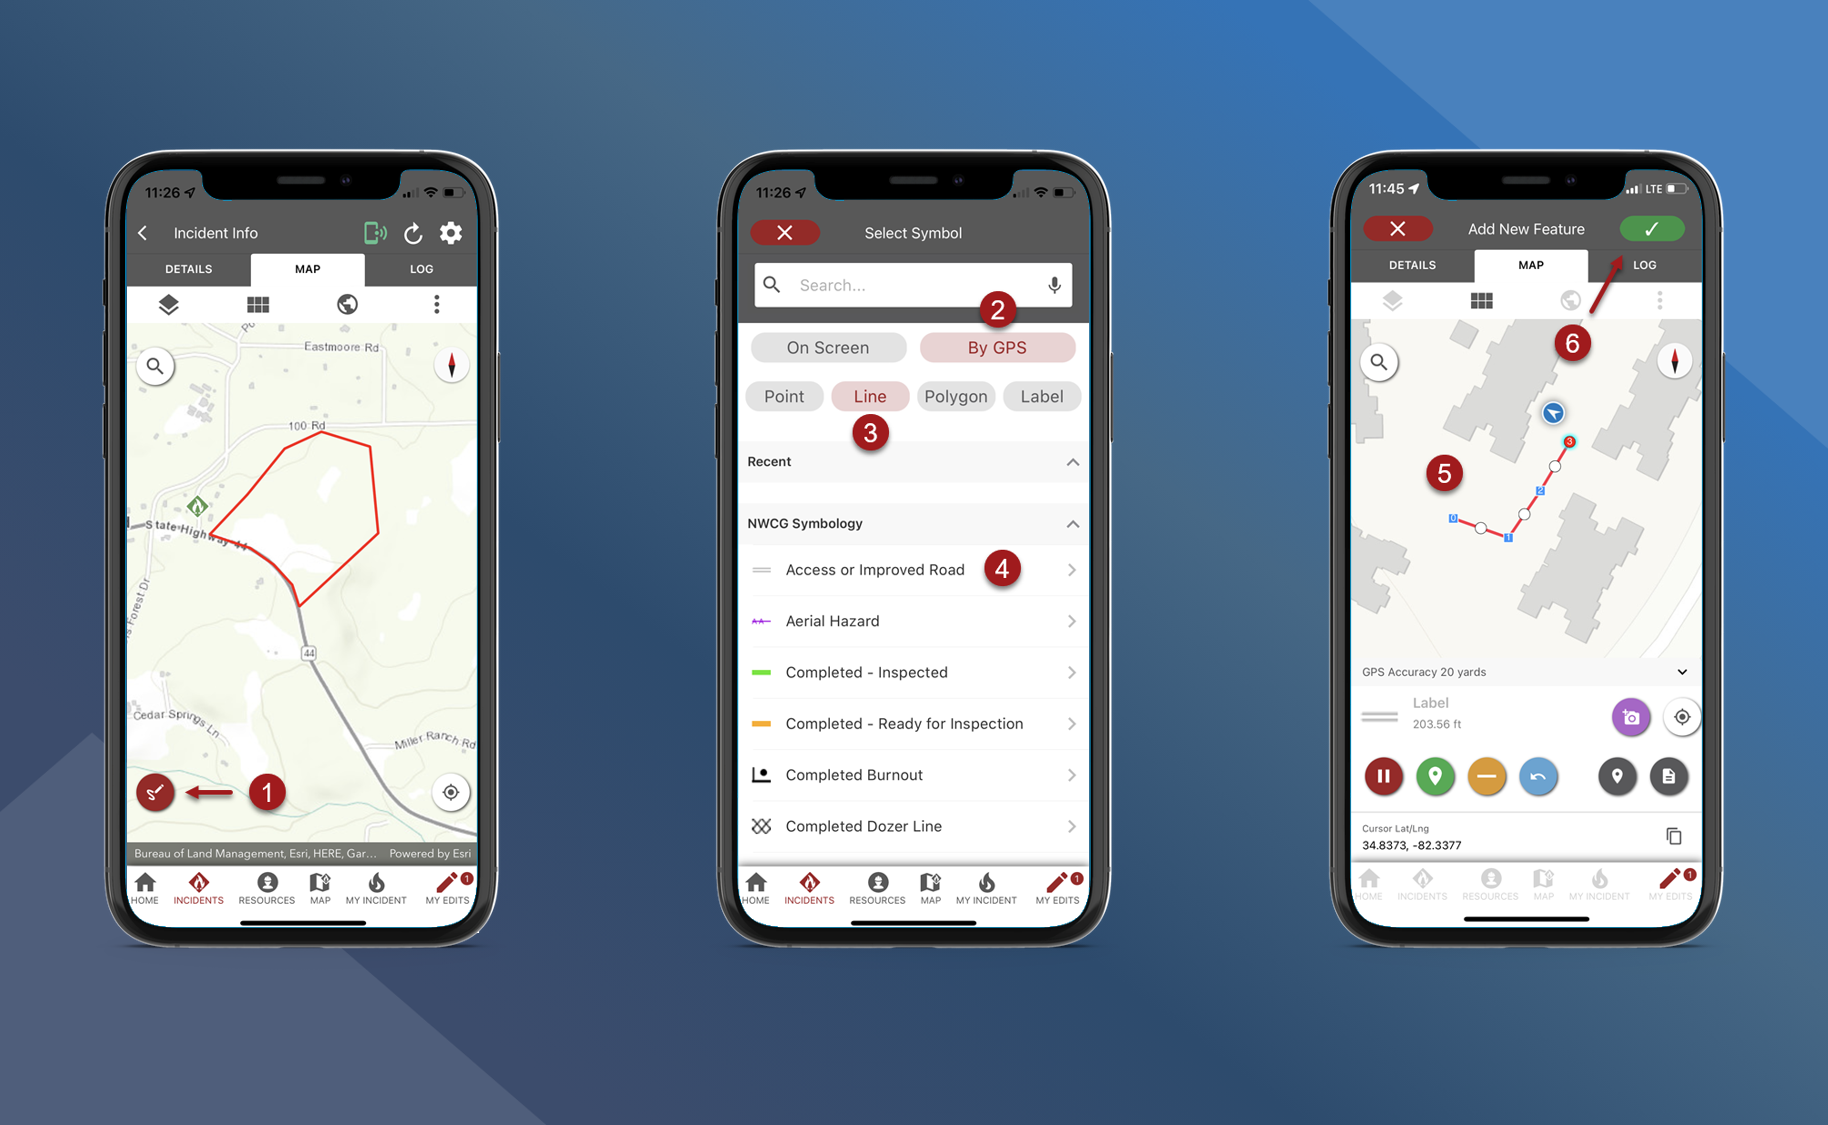
Use GPS
Tap the Create Map Feature button in the lower left corner of the screen
Select By GPS
Select map feature type (Point, Line, Polygon, or Label)
Select symbology (Select either NWCG Symbology or Basic Symbology)
The map will zoom to the user’s location. Begin walking to collect GPS data. Use the Mapping Tools buttons to collect data.
Tap ⏸ to pause
Tap the location marker to add a vertex
Tap ➖ to remove a vertex
Tap the undo arrow to undo
Tap the camera button to take a photo
When finished tap
in the top right corner of the screen