ICS Module Overview
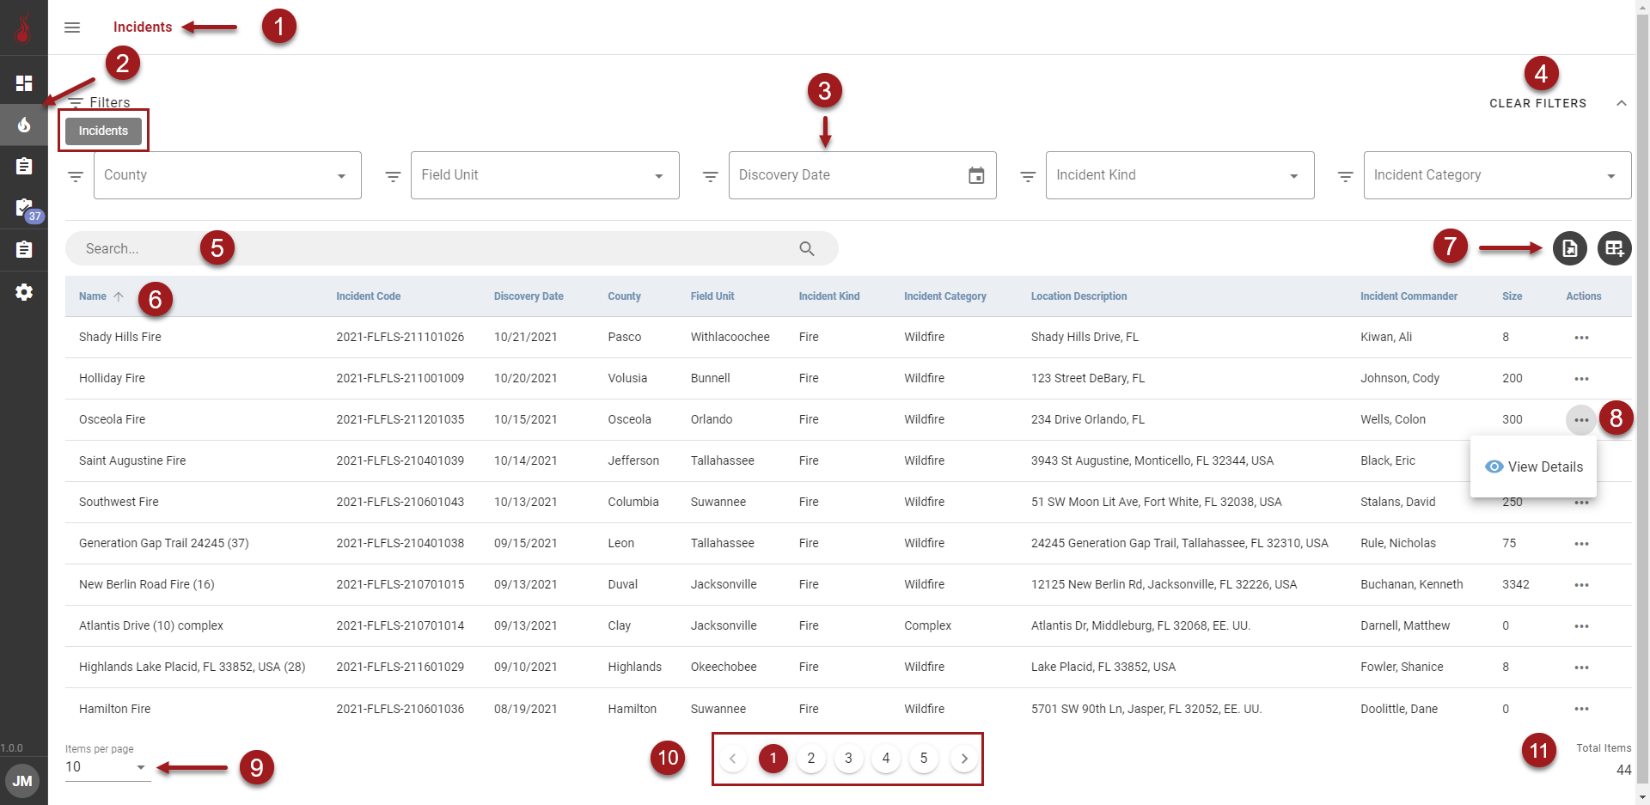
This page provides an overview of the fiResponse ICS Module. Incidents will only appear in the ICS Module after a user has manually checked the appropriate checkbox in fiResponse Desktop or in the Situational Awareness Viewer (SAVE) Application on fiResponse Web.
Note: Users must have the correct role and permissions to access the ICS Module.
Interface Overview – Grid Behavior
All grids in the ICS Module behave in a similar way. The Incidents grid is being used as an example.
View the currently selected page.
Use the icons in the drawer to switch between grids. Hover over the icons to see a tool tip.
Apply a single filter or combination of filters to the grid.
Click :Clear_Filters: to clear filters applied to the grid
Search the grid. Example: Perform a wildcard search for the Incident Name.
Hover the mouse cursor over the column header and click to sort the grid by that column ascending or descending. All grids are sorted by “Date” descending by default so the newest incident, form, etc. will be located at the top of the grid on the first page.
Click :expor: to Export or click :ColumnChooser: to open the Column Chooser.
Click :3dots: and click :ViewDetails: to open the Incident Details page for the Incident.
Change the number of rows displayed per grid page.
Use the arrow buttons to navigate pages or click on a page number to navigate to a specific page
View the number of Total Items in the grid