Rostering
In fiResponse, a roster is the term used to refer to a hierarchical grouping of resources as those resources typically respond to an incident. For example: A dozer operator may typically respond to an incident with a dozer and a transport. You can use rostering to group the dozer operator with the dozer and transport they typically operate so all three resources can be dispatched at one time.
Note: To create or edit a roster, the master filters must be used to select an office. Rosters can only be set at the office, not at any higher administrative level.
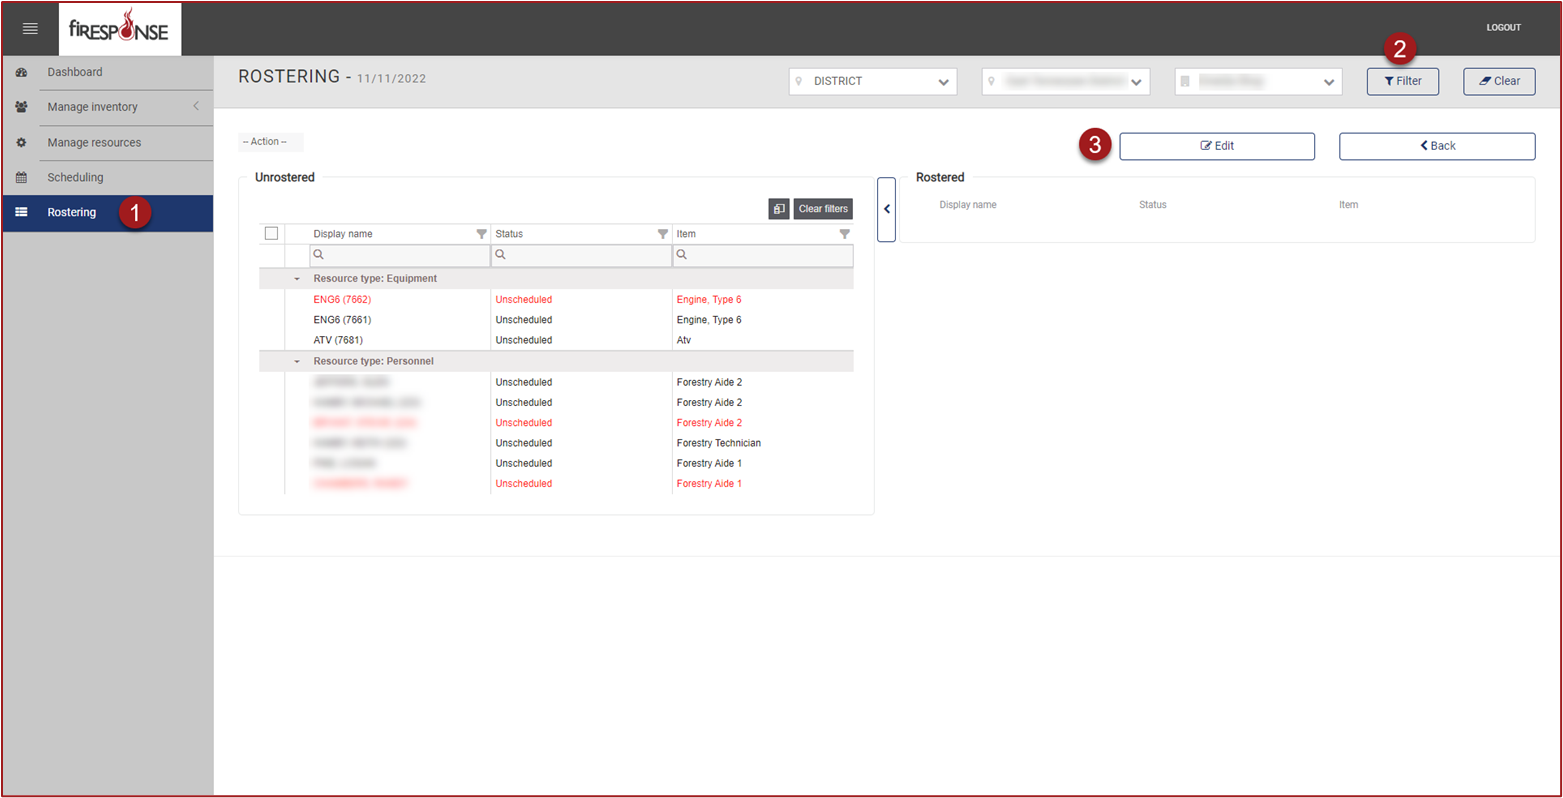
On the left-hand side in the page navigation list, click Rostering.
Select the Office from the Master Filters at the top of the page. You must click Filter to see the filtered results.
On the right-hand side, click Edit.
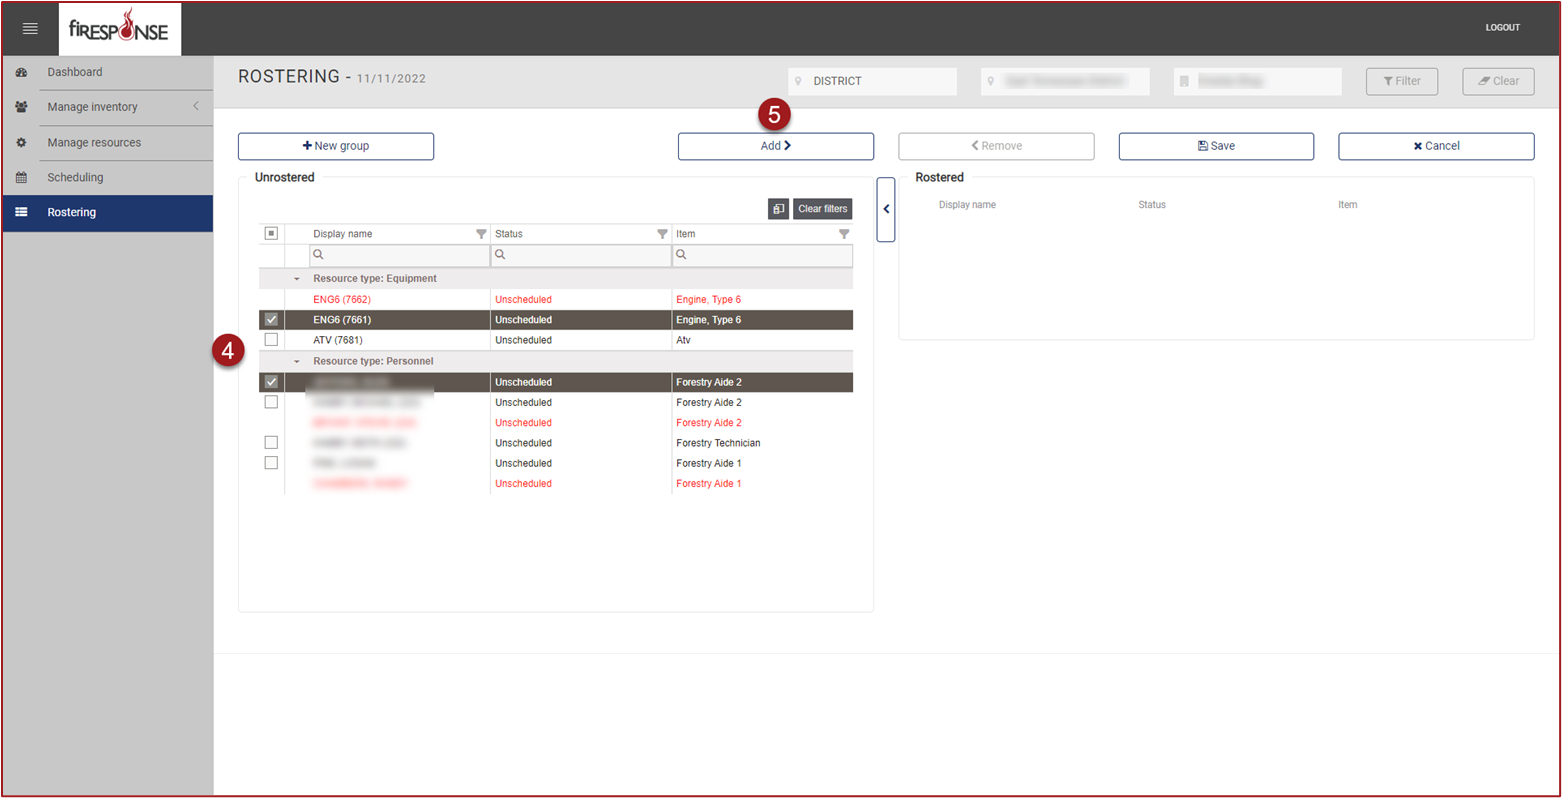
Select one or more resources from the Unrostered list.
At the top center, click the Add button or left click and hold on the resources and drag them right into the Rostered container.
In the Rostered container, arrange the resources in the desired order by left clicking, holding, and dragging. Drag the resource and drop under the resource it will be rostered with.
Click Save.
Note: After clicking Save, the Roster has been officially “published” and the REMAPP Dashboard will show the office has published a Roster for the day (i.e., row is no longer red). A Roster does not currently expire. Once set, it will remain the same until changed by a user.