Scheduling
Review the information below to learn how to perform Scheduling in REMAPP.
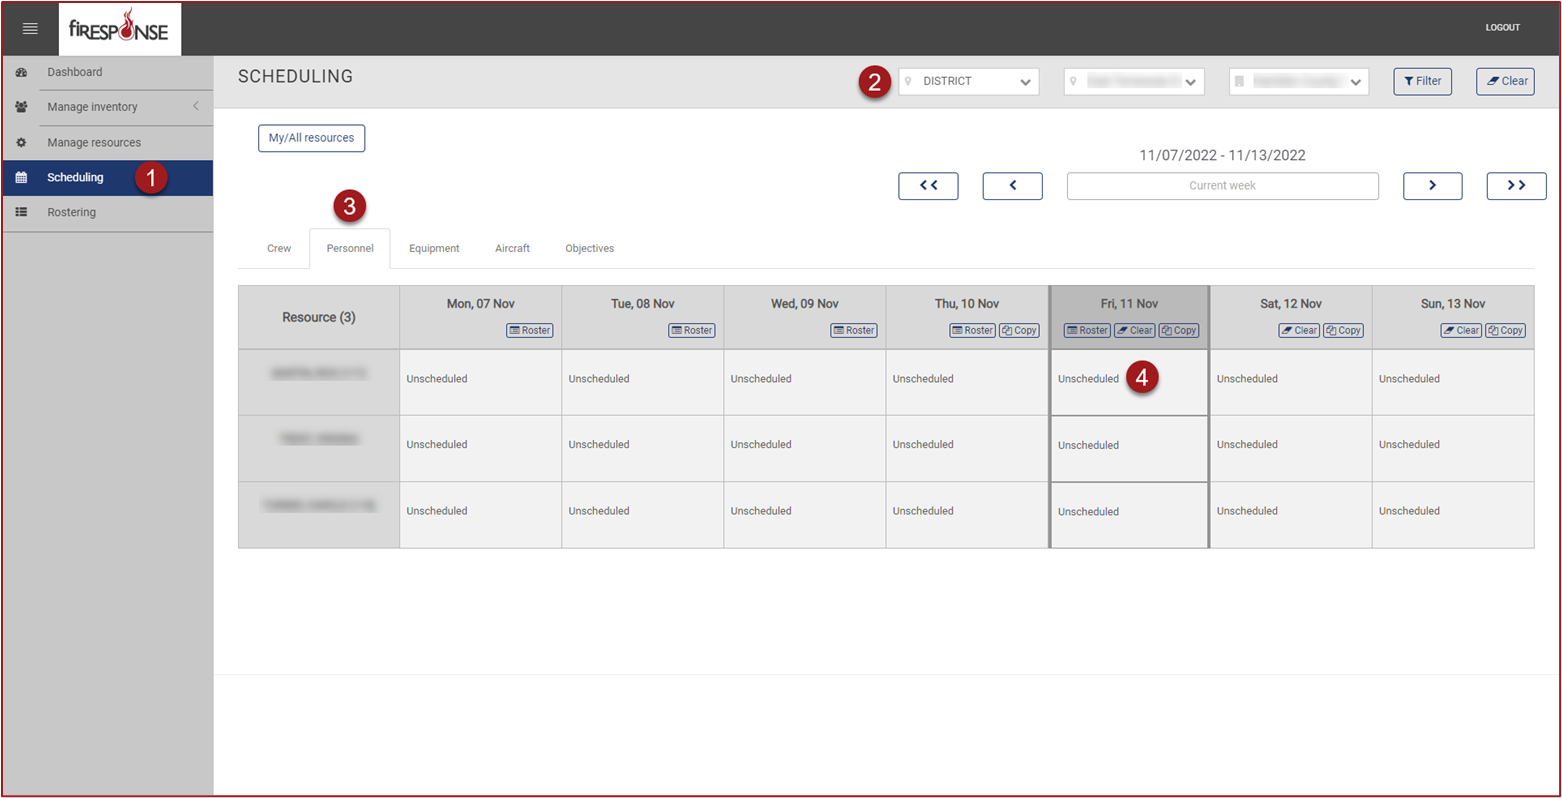
Note: To create or edit a schedule, it is recommended to use the Master Filters to select an area or office. Setting the Master Filters will reduce the number of resources visible at once time. Scheduling is a planning tool and is not intended to dictate whether or not a resource can be assigned to an incident.
On the left-hand side in the page navigation list, click Scheduling.
Set the Master Filters to the desired Office. You must click Filter after selecting values to see the filter results.
Select the Resource Kind using the tabs at the top of the Scheduling table.
Find the resource you need to update and then click on the cell with the preferred Start Date for scheduling. The column for “today” will appear highlighted.
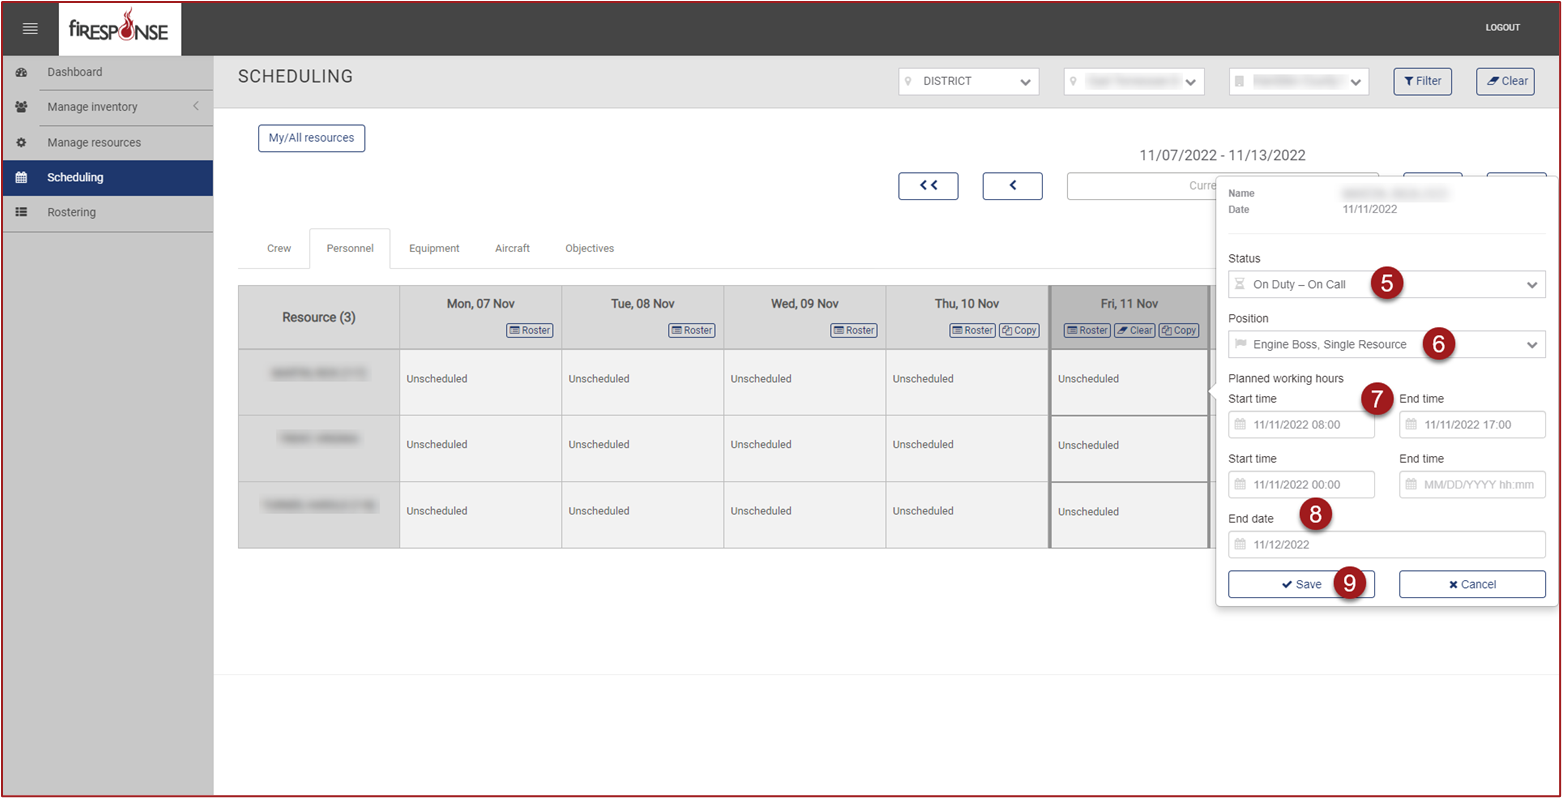
Set the Status.
Set the Position (optional).
Set the Start Time (if present) and End Time (if present).
Set the End Date.
Click Save.
Tip: Schedules can be set for longer periods of time by setting the End Date to the desired date in the future.